Crafting a Useful Calendar in Google Docs: A Complete Information
Associated Articles: Crafting a Useful Calendar in Google Docs: A Complete Information
Introduction
With nice pleasure, we are going to discover the intriguing subject associated to Crafting a Useful Calendar in Google Docs: A Complete Information. Let’s weave attention-grabbing data and provide contemporary views to the readers.
Desk of Content material
Crafting a Useful Calendar in Google Docs: A Complete Information

Google Docs, primarily identified for its text-editing capabilities, is not the best platform for creating a totally interactive, feature-rich calendar. Devoted calendar purposes like Google Calendar provide far superior performance, together with reminders, occasion scheduling, and integration with different Google providers. Nevertheless, for easy, visible calendars or as a supplementary software inside a bigger doc, Google Docs can surprisingly suffice. This text explores numerous strategies for making a calendar in Google Docs, starting from easy table-based options to extra visually interesting choices leveraging shapes and drawing instruments. We’ll additionally delve into greatest practices for group, formatting, and maximizing readability.
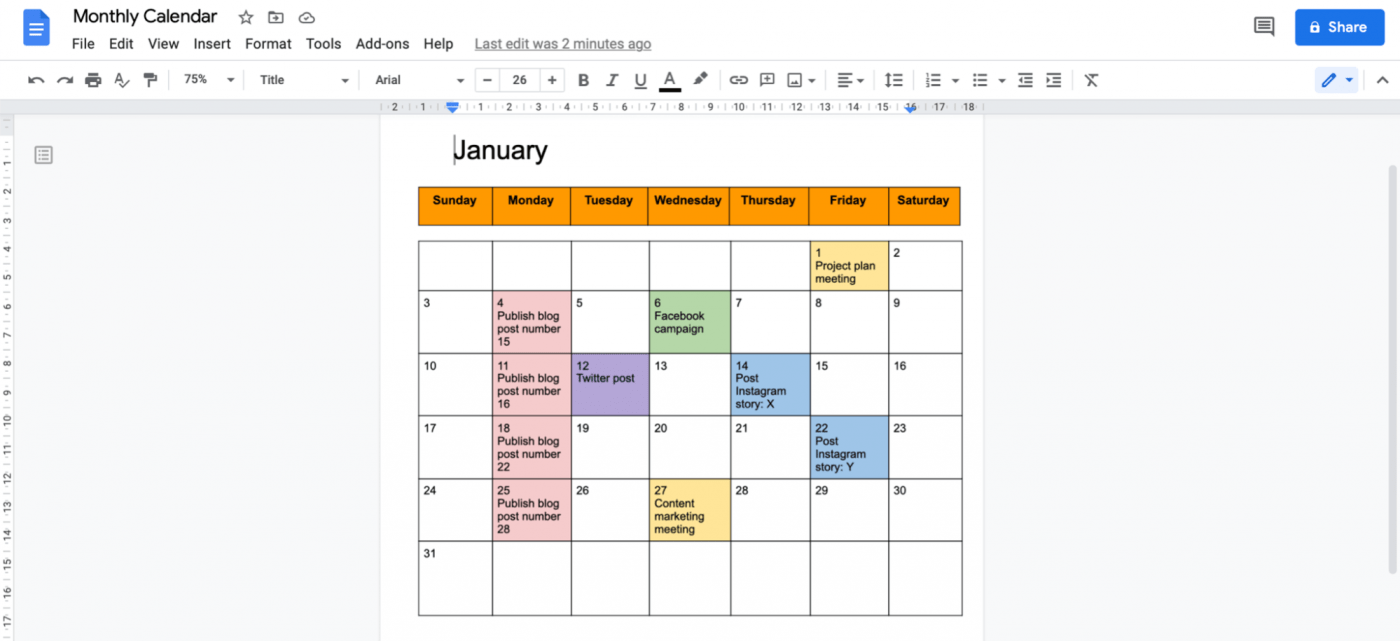
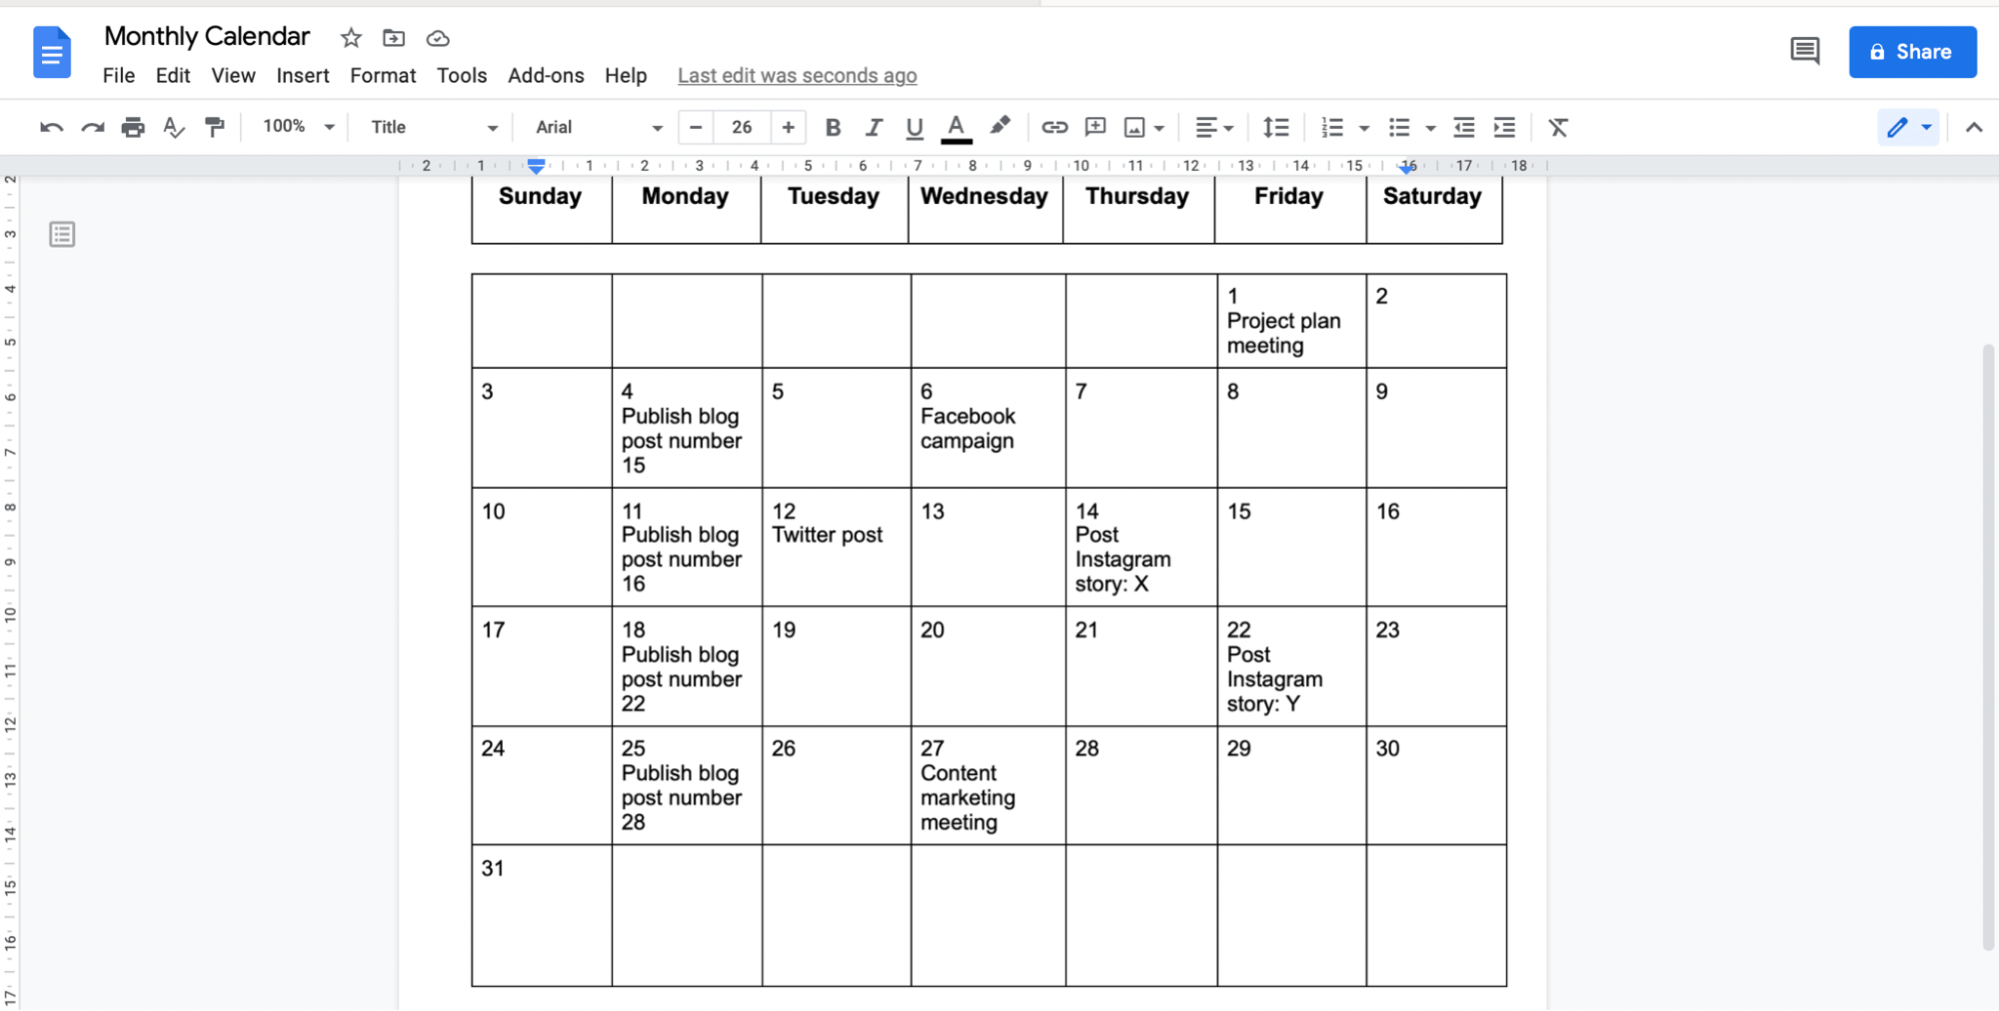
Technique 1: The Primary Desk Calendar
That is the best and quickest technique for making a calendar in Google Docs. It leverages the built-in desk performance to construction the calendar format.
-
Creating the Desk: Begin by inserting a desk. The variety of rows and columns will rely on the month and the specified stage of element. For a month-to-month calendar, you may want at the least six rows (for weeks) and 7 columns (for days). Go to "Insert" > "Desk" and choose the suitable dimensions.
-
Including Headers: Within the prime row, enter the times of the week (Sunday by Saturday).
-
Including Dates: Within the subsequent rows, fill within the dates for the chosen month. Keep in mind to account for the beginning day of the week for that particular month.
-
Formatting the Desk: Improve readability by formatting. You’ll be able to alter cell borders, font measurement, and coloration. Think about using daring textual content for the header row and probably alternating row colours for improved visible distinction. Modify column width to make sure even spacing.
-
Including Occasions: You’ll be able to add occasions immediately into the desk cells, both by typing them in or utilizing numbered/bulleted lists for a number of occasions on a single day. Colour-coding occasions with totally different textual content colours or highlighting can additional enhance group.
Limitations of the Desk Technique:
- Restricted Performance: This technique lacks options like reminders or occasion linking.
- Handbook Updates: Updating the calendar for subsequent months requires handbook recreation of the desk.
- Visible Simplicity: The visible attraction is proscribed in comparison with different strategies.
Technique 2: Leveraging Shapes and Drawing Instruments for a Visually Enhanced Calendar
This technique provides larger flexibility in design and visible attraction, however requires extra effort and time.
-
Creating the Grid: As an alternative of utilizing a desk, create the calendar grid utilizing shapes. Insert squares or rectangles to signify the times. Exact alignment is essential for a clear look, so make the most of the rulers and guides in Google Docs.
-
Including Dates and Days: Insert textual content packing containers inside every form so as to add the date and day of the week. Constant font measurement and magnificence are important for sustaining uniformity.
-
Occasion Illustration: Make use of numerous shapes (circles, rectangles, and many others.) and colours to signify several types of occasions. You could possibly use totally different colours for work, private appointments, or holidays. Place these shapes throughout the applicable day’s textual content field or alongside it.
-
Including Visible Components: Improve the aesthetic attraction by including ornamental components like borders, traces, or background pictures. Nevertheless, keep away from overcrowding the calendar, as this could hinder readability.
-
Month and 12 months Header: Create a separate textual content field to show the month and 12 months. Use a bigger font measurement to make it outstanding.
Benefits of the Form Technique:
- Better Visible Customization: Provides extra design freedom in comparison with the desk technique.
- Improved Aesthetics: Can create a extra visually interesting and fascinating calendar.
Disadvantages of the Form Technique:
- Time-Consuming: Requires extra effort and time to create and keep.
- Handbook Alignment: Exact alignment of shapes requires cautious consideration to element.
Technique 3: Importing a Pre-made Calendar Template
A number of web sites provide free downloadable calendar templates in numerous codecs, together with picture information (.png, .jpg) and even editable doc codecs (.docx). You’ll be able to obtain these templates and insert them into your Google Docs doc.
-
Discovering a Template: Search on-line for "printable calendar templates" or "Google Docs calendar templates." Select a template that fits your wants and magnificence.
-
Downloading and Importing: Obtain the chosen template. If it is a picture file, merely insert it into your doc utilizing "Insert" > "Picture." If it is an editable doc, you possibly can copy and paste the content material into your Google Doc.
-
Customization (If Relevant): For those who’ve downloaded an editable template, you possibly can customise it additional by altering fonts, colours, and including your personal occasions.
Benefits of Utilizing Templates:
- Time-Saving: Avoids the necessity to create the calendar from scratch.
- Number of Designs: Provides entry to varied kinds and layouts.
Disadvantages of Utilizing Templates:
- Restricted Customization (Picture Templates): Picture templates are sometimes not editable.
- Potential Copyright Points: Make sure you use templates with applicable licensing.
Greatest Practices for Calendar Creation in Google Docs:
- Constant Formatting: Preserve constant font kinds, sizes, and colours all through the calendar for improved readability.
- Clear Labeling: Clearly label every day and month.
- Colour-Coding: Use color-coding to distinguish occasions or categorize duties.
- Acceptable Font Measurement: Select a font measurement that’s simply legible.
- White Area: Use enough white house to forestall the calendar from showing cluttered.
- Common Updates: Preserve your calendar up to date frequently to replicate adjustments in your schedule.
Conclusion:
Whereas Google Docs is not a devoted calendar software, it provides enough instruments to create practical and visually interesting calendars for easy wants. The very best technique relies on your particular necessities, design preferences, and out there time. For complicated scheduling and options like reminders, nonetheless, Google Calendar or different devoted calendar purposes stay the superior selection. By using the strategies outlined above and adhering to greatest practices, you possibly can successfully create a calendar in Google Docs that serves as a useful gizmo inside your paperwork. Keep in mind to prioritize readability and readability to make sure your calendar stays a useful useful resource somewhat than a visible impediment.


Closure
Thus, we hope this text has supplied invaluable insights into Crafting a Useful Calendar in Google Docs: A Complete Information. We thanks for taking the time to learn this text. See you in our subsequent article!